Tuesdays with Dorie: French Chocolate Brownies
June 3, 2008 at 6:04 am | Posted in cookies & bars, groups, sweet things, tuesdays with dorie | 67 Comments
Next in the queue for Tuesdays with Dorie is the recipe for French Chocolate Brownies, courtesy of Di from Di’s Kitchen Notebook. I first heard of this recipe about a year ago when it was included in a New York Times article about brownies…I saved it and (even though it doesn’t call for nuts) have been wanting to make it ever since. Seems Dorie originally intended these to be a fondant-style cake when she served them at a dinner party for French friends, but they just assumed that their American hostess had made them brownies. Dorie, not missing a beat, went right along with it, and everyone loved them!
Some TWDers noted long baking times and a dry crust as drawbacks of this recipe. Mine came out with quite a nice thin crust layer, and it wasn’t overly crackly either. I made a half recipe in a loaf pan…I took them out at the 45 minute mark, although I admit that I accidentally baked them at 325°F. Oops–I’m not always paying complete attention, but luckily no brownies were hurt due to negligence! Not quite a fudgy brownie, and not quite a cakey one either, these had an almost silky texture that I liked a lot when eaten at room temperature (not so appealing cold, though).
Something really funny that I’ve learned from TWD is that there are a lot of raisin-haters out there. I thought maybe I was the only one, so I feel better knowing I’m actually in good company. This brownie recipe called for rum-flamed raisins to be mixed into the batter, which sounded less than thrilling. I’m all for a good flambé, though, so I decided to ignite some chopped dates instead. The dates worked really well…just kind of melding into the overall sweetness of the brownies, rather than being too conspicuous.

To go alongside these faux French pastries, I made Dorie’s recipe for Faux Crème Fraîche, near the back of the book. It’s just a little vanilla whipped cream with some sour cream folded in, but somehow it made the whole thing très chic.
Open up Di’s Kitchen Notebook or Baking: From My Home to Yours by Dorie Greenspan to find the recipe. (Dorie has also written about it on Serious Eats.) Don’t forget to check out the TWD Blogroll!
Tuesdays with Dorie: Traditional Madeleines
May 20, 2008 at 3:37 am | Posted in cakes & tortes, cookies & bars, groups, simple cakes, sweet things, tuesdays with dorie | 55 Comments
I’d been crossing my fingers that Tara of Smells Like Home would choose a cookie for this week’s Tuesdays with Dorie recipe. Then Tara picked Dorie’s Traditional Madeleines–score! I know that a madeleine is really cake in cookie’s clothing, but after all the hard-core desserting I’ve been doing (and still have left to do this month), I was happy to have something that’s just a sweet bite.
I have fond voluntary (as opposed to Proustian-ha!) memories of these little scalloped-shaped cuties. Actually my memories are quite recent, as we made madeleines as part of the petits fours plate at the restaurant I last worked for. That recipe uses browned butter and almond flour, and we made a variety of flavors, from lavender to lemon-thyme, depending on what we felt like or what we had available.

Dorie’s recipe is flavored with lemon zest, and even though she doesn’t instruct you to brown the melted butter, I went ahead and did it anyway. Browned butter just has such a beautiful flavor, I used my non-stick mini madeleine pan (which is the only one I have, and trust me, you still need to grease it well) to bake them off, and made half of Dorie’s recipe. Rather than sprinkling them with powdered sugar before serving, I tossed the still-warm madeleines in some finely ground vanilla sugar.
I will say that these make very good little lemony tea cakes. They are soft and light and tasty (do bake them right when you are ready to eat them though, as they stale quickly). But I have one gripe. If we are talking about “tradition” here, then madeleines are supposed to have a bump on their backsides. We learned in culinary school that the bump is desirable, and our instructor said that madeleines are often presented with their bums in the air (rather than scalloped side up) to show them off. Dorie calls for chilling the batter for at least three hours to help form this bump. The same day I made the batter, I baked up half of it after letting it chill for several hours. No bump. The next day, I baked up the remaining batter (it had now been chilling overnight). Two madeleines had the bump…the rest didn’t. Ah well…after conferring with other TWDers, this seemed to happen to most everyone. And as Ulrike pointed out, even the Traditional Madeleines pictured in Dorie’s book don’t have bumps!

If you’d like to try your hand at baking madeleines (and see if you get the coveted golden bump!), you can find the recipe here on Smells Like Home or in Baking: From My Home to Yours by Dorie Greenspan. Don’t forget to check out the TWD Blogroll!
Snickerdoodles
April 16, 2008 at 4:40 pm | Posted in book review, cookies & bars, sweet things | 17 Comments
I think that snickerdoodles are totally underrated. Sure everyone loves them, but if asked to name a favorite cookie, I bet very few people think of them first. They don’t have chips, or nuts or raisins, but their beauty is in their old-fashioned simplicity…and in their adorable crinkly tops.
When I first thumbed though The Sweet Melissa Baking Book by Melissa Murphy (see here for my review), her recipe for snickerdoodles was the first that I wanted to try. This is such an easy cookie to make, and you don’t even have to have any fancy ingredients. The effort to reward ratio here is really in the baker’s favor. The recipe makes a lot– three dozen cookies if you use her one ounce size guideline. That’s too many for us to eat at once, but cookie dough freezes beautifully. So in a few days, I can thaw out a bit more dough and bake a few more of these sweet, cinnamony and slightly chewy cookies. Lovely!

The smell of cinnamon and butter baking in the oven is so good– I should manufacture a snickerdoodle-scented room spray.
Snickerdoodles– makes 3 dozen cookies
from The Sweet Melissa Baking Book by Melissa Murphy. All rights reserved. Copyright © Melissa Murphy, 2008
For the dough:
½ pound (2 sticks) unsalted butter, softened
1 ½ cups sugar
2 large eggs
2 ¾ cups all-purpose flour
1 ½ teaspoons cream of tartar
1 teaspoon baking soda
¼ teaspoon kosher saltFor the cinnamon sugar:
1 ½ teaspoons ground cinnamon
½ cup sugar
-In the bowl of an electric mixer fitted with the paddle attachment, cream the butter and sugar until smooth, 2 to 3 minutes. Add the eggs and mix until combined.
-In a separate bowl, whisk together the flour, cream of tartar, baking soda, and salt. Add to the butter mixture and mix on low speed until combined. The dough will be soft and too sticky to roll. Refrigerate until firm, about 1 hour.
-Position a rack in the top and bottom thirds of your oven. Preheat the oven to 350°F. Line two cookie sheets with parchment paper or aluminum foil.
-For the cinnamon sugar: Combine the cinnamon and sugar in a small bowl.
-Using a 1-ounce cookie scoop, or a tablespoon, shape the dough into balls and then roll them in the cinnamon sugar.
-Place the cookies 2 inches apart on the prepared cookie sheets. Flatten them slightly with your fingertips so that they stay put. Bake for about 12 to 13 minutes, or until the bottoms are slightly golden in color. These cookies are supposed to be chewy, so do not overbake. Remove to a wire rack to cool.
*Snickerdoodles keep in an airtight container at room temperature for up to 4 days. For longer storage, freeze well wrapped in plastic wrap and then aluminum foil for up to 3 weeks. Do not uncover before defrosting.

Tuesdays with Dorie: Snickery Squares
March 4, 2008 at 8:22 pm | Posted in cookies & bars, groups, sweet things, tuesdays with dorie | 34 Comments
Erin of Dinner and Dessert was at the controls for this week’s Tuesdays with Dorie recipe. She chose Dorie Greenspan’s Snickery Squares from the book Baking: From My Home to Yours. Dorie calls these “classy Snickers.” Shortbread, dulce de leche, candied peanuts and chocolate glaze…okay, there’s no nougat, but we won’t get too technical here! They still sounded candybar-licious to me!
I can’t say that I’ve noticed store-bought dulce de leche at my local grocery store in Sydney, so I made my own from a can of sweetened condensed milk . I threw caution to the wind and did it they way they all say not to…I boiled it in the can for three hours. Luckily there were no horrific explosions, and when I opened up the tin a few days later (I went away for the weekend and stashed it in the fridge), I had a can of beautifully thick caramel goo.

My bars look a little more oozy than they probably should. I just made them this afternoon, and had to shortcut the chilling time before their photo-session, as my daylight was fleeting! These are rich…super-rich. I’d maybe prefer a thinner layer of bittersweet chocolate topping, but besides that, no complaints here!
You can find the recipe for Snickery Squares in Baking: From My Home to Yours or on Dinner and Dessert. And don’t forget to check out the posts from the other Tuesdays with Dorie members!
browniebabe #3: Milk Chocolate Brownies with Wattleseed
August 16, 2007 at 4:22 pm | Posted in cookies & bars, events, sweet things | 6 Comments
Woo-hoo! It’s browniebabe time again over at Once Upon a Tart. Myriam continues to taunt us all with her super-cute apron! I’ve already declared my love for all things plain and simple when it comes to brownies, so I really tried hard to think of an uncomplicated brownie that was a little different.
The last time R went to the States was back in February. I gave him a shopping list to stuff to bring back…Crystal hot sauce, Diamond Kosher salt, Jif, Quaker oats, Cascade dishwasher tabs (how this guy made it through customs, I do not know). When he called from the airport while waiting for his flight back to Sydney, I tacked one more last-minute item to the list: a Gourmet magazine from the airport bookshop.
A recipe on the last page of that issue has stuck out in my mind since– milk chocolate brownies. I’m definitely a dark chocolate fan (and the higher the percentage, the better), but this sounded interesting. I went out and got myself a couple bars of Lindt Excellence, which in the same issue, Gourmet named as their preferred milk chocolate for general cooking purposes.
I bought some wattleseed awhile back, but still hadn’t used it. This is something that I’ve had in restaurant desserts here, and was excited to find at my spice shop. Wattleseed is from the Acacia plant, native to Australia, and is often described as tasting like a combination of chocolate, coffee and hazelnut. All good things for a brownie I think, so I eye-balled in a couple teaspoons to the recipe. I don’t think wattleseed is readily available outside Australia, but a little instant espresso powder will do the trick if you are looking to make the flavor a bit deeper (I always put it in my dark chocolate brownies anyway).

These brownies were surprisingly good, and I’d definitely make them again. They had a perfect texture–crackly tops and chewy, but not raw, centers. They were thankfully not as sweet as I’d imagined they would be. They had a nice caramely flavor from the chocolate with a hint of coffee from the wattleseed. The seeds and the extra milk chocolate that gets stirred in as chips at the end give the brownies a little crunch.
If you want the basic milk chocolate brownie recipe, you can find it in the February 2007 issue of Gourmet magazine, or here on Epicuious.
Graham Crackers
August 8, 2007 at 6:17 pm | Posted in cookies & bars, sweet things | 13 Comments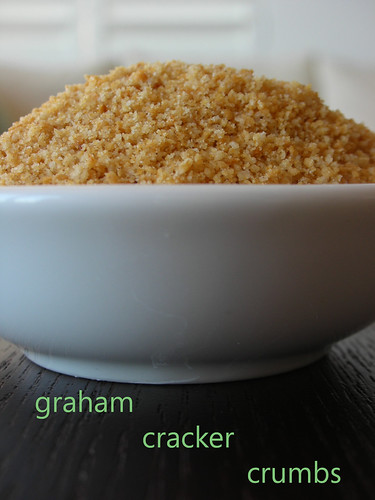
Yes, I am aware that it looks like I’ve taken a photo of a pile of damp sand, but a few crumbs are all that I have left to share of my experience with homemade graham crackers. I have plans for those leftover crumbs, though…you wait and see.
Waaay back when, I promised that if anyone was interested, I would give the recipe for homemade graham crackers that I used in making my Namaimo bars. I did get a request, and I’m sorry it has taken me so long to get this out.
This recipe is from The King Arthur Flour Cookie Companion, which calls them “the best graham crackers.” And I can attest to them being very tasty, since I did a quality control check before I whizzed the batch to bits. I imagine they’d be very good with a little peanut butter (one of my favorite snacks).
Graham Crackers – makes 32 crackers (3.5″ x 2.5″)
adapted from The King Arthur Flour Cookie Companion
1/2 c (2 oz) all-purpose flour
1 1/2 c (7 7/8 oz) whole wheat flour
3/4 c (3 oz) powdered sugar
1 t baking powder
1/2 t salt
1 t cinnamon (optional)
1 stick (4 oz) unsalted butter
2 T (1 1/2 oz) honey
2 T (1 oz) cold milk
– Preheat the oven to 325°F/165°C. Have ready two baking sheets, with parchment to match.
– Whisk dry ingredients together in a medium bowl. Using a pastry blender or your fingertips, cut the butter into the dry ingredients until crumbly.
– In a separate bowl, stir the honey into the milk to dissolve. Add the liquid ingredients to the dry, tossing with a fork until it comes together. If it seems to require more liquid to come together (mine did), add a little extra milk.
-Turn the dough onto a well-floured surface and fold it over gently 10-12 times until smooth (I found a metal bench scraper to be quite helpful here). Divide the dough in half, and form each half roughly into a rectangular shape. Work with one half at a time, keeping the other half covered.
-On the counter, lightly flour one of your parchment sheets and a rolling pin. Roll one piece of dough on the parchment, adding a little more flour as necessary, into a rectangle about 10″ X 14″ (almost the size of your parchment). The dough should be about 1/16″ thick. Trim the edges to make a clean rectangle and dock evenly with a fork.
-Using a pizza or pastry wheel, cut the dough into 16 rectangles. Lift the parchment onto your baking sheet. There is no need to separate the cookies– they will bake together, but will break apart easily along the pre-cut lines when slightly cooled.
-Repeat the last two steps for your other half of dough.
-Bake for 15 minutes, or until medium gold all over (mine took a little longer). Let the crackers cool on the pan until just barely warm. Carefully snap crackers apart and cool them completely on a rack, before wrapping them tightly for storage.
WCC#18: Nanaimo Bars
July 5, 2007 at 6:48 pm | Posted in cookies & bars, events, sweet things | 27 Comments
“This looks good. What is it?” R asked.
“It’s a Nanaimo bar,” I replied.
I may be from south of the border, but when I saw that the theme of this month’s Weekend Cookbook Challenge is “red and white,” I immediately thought of the Canadian flag. Perhaps this was because Canada Day had just passed, or perhaps because Sara from i like to cook (creator and host of WCC) lives in Canada…I don’t know. I did know that I wanted to make Nanaimo bars, a British Columbian treat named after a city on Vancouver Island, for my entry. I love these simple bar cookies, with melt-in-your-mouth ganache and filling layers and a chocolaty graham cracker crust (a little goes a long way, though, as they are really sweet). So I opened a book with a red and white spine, The King Arthur Flour Cookie Companion, and found the recipe I was looking for.
I have to admit that I thought this would be a pretty easy recipe to whip up. I didn’t know that the “challenge” part of the equation would be finding graham crackers here in Sydney. I went to four different grocery stores, one 7-11 and one import shop, but no luck. I thought about replacing them with plain chocolate wafers, but couldn’t find those either. Worn out from my search, I went home and made my own graham crackers from a recipe in the same book. (While they were quite good on their own, I don’t think making graham crackers from scratch is necessary for these bars. Therefore, I’m not including those steps below. If like me, you cannot find them at the store, let me know, and I’ll be happy to add the recipe.)
I don’t remember when I first had a Nanaimo bar, but it could have been on any number of trips up north. My first time in Canada was with Grandma W, who took me to Vancouver for the 1986 World’s Fair. Since then, I have traveled extensively through the country. Two weeks spent on Grand Manan Island with high school classmates sealed my love of the Maritime Provinces. The cute, smart, funny boy from Dundas, Ontario that I went out with for three years was reason enough to make the trip to the Toronto area several times. I have probably been to more national parks in Canada than in the US, and I think there is no place more beautiful than the Canadian Rockies in early spring. Where do I hope to go next? Maybe PEI or Quebec City. Although now that I really think about it, while I have been to Victoria, I have never been to Nanaimo…
Nanaimo Bars– makes 48 small bars
adapted from The King Arthur Flour Cookie Companion
for the crust:
1 stick (4 oz) unsalted butter, melted
1/4 cup (1 3/4 oz) sugar
1/3 cup (1 oz) unsweetened cocoa powder
1 large egg
1 cup (3 oz) sweetened flaked coconut
1/2 cup (2 oz) chopped walnuts
1 t vanilla extract
2 cups (10 oz) graham cracker crumbs
for the filling:
1 stick (4 oz) unsalted butter, softened
2 cups powdered sugar
1/2 t vanilla extract
2 T instant vanilla pudding mix
2 T milkfor the frosting:
1 cup (6 oz) chopped dark chocolate
2 T (1 oz) unsalted butter
-for the crust: Preheat oven to 350°F/180°C. Grease a 9×9-inch or 11×7-inch pan and line the bottom with parchment. Combine melted butter, sugar and cocoa in a bowl, then mix in the egg. Stir in the coconut, chopped nuts, vanilla and graham cracker crumbs. Press into the botton of the prepared pan and bake for about 10 minutes. Cool crust completely before filling and frosting.
-for the filling: Cream the butter by hand in a medium bowl and add in 1 cup powdered sugar and the vanilla. In a separate small bowl, stir the milk and pudding mix together, then add to the butter mixture. Add in the remaining powdered sugar and beat vigorously until free of lumps. Spread over the cooled crust and refrigerate until cold (half an hour is good).
-for the frosting: Melt the chocolate and butter together using a double boiler or the microwave, stirring until smooth. Spread and smooth over the chilled bars and refrigerate until set (another half hour or so). Cut with a sharp knife (heat your knife if you have trouble with the chocolate cracking).
browniebabe #2: Brownie Sundae
June 4, 2007 at 7:16 pm | Posted in cookies & bars, events, sweet things | 7 Comments
I’ve been known to like some flashy things: fancy shoes, handbags, caviar. When it comes to brownies, though, I am decidedly plain-jane. No swirls of cheesecake, peanut butter or raspberry jam….a few walnuts on top are the only bling I like baked into my brownies. Now I know that, as much as I love it, my humble little square of chocolatey goodness probably won’t win me any awards on its own. Myriam at Once Upon a Tart has the cutest apron ever reserved for the winner of browniebabe of the month, and I at least want a shot at it! After wondering how I could jazz it up for my entry into the second event, I decided to turn it into a brownie sundae. Ice cream and chocolate sauce really do make everything better, don’t they?
This is my mother’s brownie recipe, and it’s the fudgy kind of course. My puddle of sauce is David Lebovitz’s “Lean Chocolate Sauce” from page 165 of his newest book, The Perfect Scoop, but he has a similar recipe here on his site. Any ice cream flavor you love with chocolate would be great on a brownie sundae. I used a caramel ice cream from Paddington-based Nice Cream (altough if KitchenAid Australia will ever finally sell me a part allowing me to use the ice cream maker attachment I brought from the US on my new machine here, I’d sure like to make Monsieur Lebovitz’s Vietnamese Coffee Ice Cream).
Julie’s Brownies – makes 6 servings (or one loaf pan)
3 oz unsalted butter
2 1/2 oz unsweetened chocolate
2 t instant coffee or espresso powder
pinch salt scant
1 cup sugar
2 large eggs
scant 1/2 cup all-purpose flour
handful of broken walnut pieces
– Preheat oven to 325°F/160°C. Butter a loaf pan and line the bottom with parchment.
– In a heavy bottomed pot, melt the butter and chocolate together over low heat, paying close attention so as not to burn. Add instant coffee or espresso powder and stir to dissolve. Stir in the sugar and salt. Let mixture cool until just warm.
– Once cooled, beat in the eggs, one at a time. Then fold in the flour until just combined.
– Spread batter into prepared pan, top with nuts and bake. Start checking them after 35 minutes, but they will probably take closer to 45. A tester will probably still come out sticky, so look for a thin slightly crackled layer on top.
– Let brownies cool completely before cutting them. (I think they are even better the second day.)
Anzac Biscuits
April 26, 2007 at 9:27 pm | Posted in cookies & bars, sweet things | 2 Comments
Yesterday was Anzac Day, a national day commemorating the Australian and New Zealand military forces, and was started after World War I’s Battle of Gallipoli. After watching the military veterans march through the streets of rainy downtown Sydney in the morning, I returned home to make up a batch of Anzac biscuits (“cookies” to Americans). Legend has it that mothers, wives and girlfriends sent these biscuits to troops abroad. Since they don’t contain eggs and are made with pretty hearty ingredients, they are supposed to have an excellent shelf life.
I had never actually had an Anzac biscuit, but knew I would like any sweet containing oatmeal and coconut! I used this recipe, and had great results. I added just 1/8 teaspoon of salt to round out the flavors and made them about half the size as in the instructions. They flatten out quite a bit in the oven, and I didn’t want them quite as big as dinner plates! I baked one tray crispy and one tray a bit chewy. Both ways are good, but I like the crispy ones a bit better.

If you are making these in the US, dessicated coconut (which is finely grated and unsweetened) and golden syrup (or treacle) may be a bit hard to find. The coconut is usually sold in health food stores and the syrup can be found in gourmet or British import shops. I’ve bought a brand called Lyle’s before that comes in a green tin. Also, please note that the Australian tablespoon measurement is slightly larger than the US measurement, and equals four teaspoons instead of three. All other measurements are equal. Bake them at 350°F.

These cookies arealso tasty in ice cream sandwich form! The toasted honey and walnut ice cream from Gundowring is a great match.

Baked Fresh Weekly

Blog at WordPress.com.
Entries and comments feeds.

