Tuesdays with Dorie BCM: Gingerbread Bûche de Noël
December 23, 2014 at 12:01 am | Posted in BCM, cakes & tortes, groups, layer cakes, sweet things, tuesdays with dorie | 23 CommentsTags: baking, cake, dessert, holiday
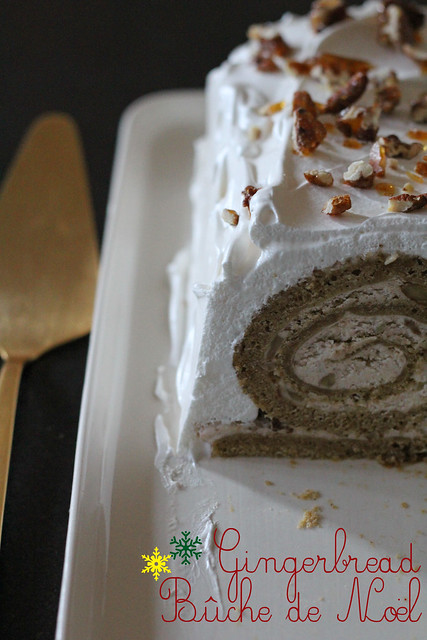
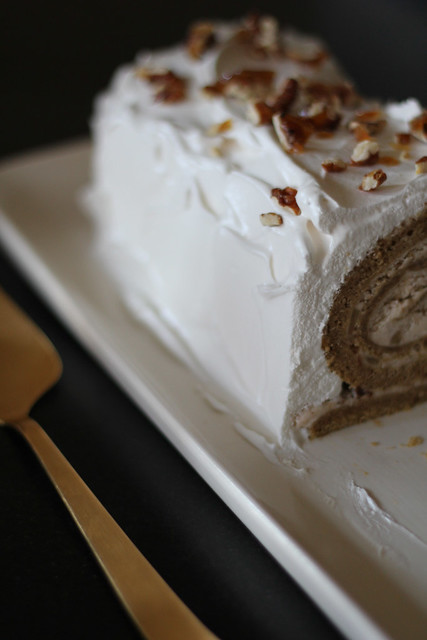
It’s almost Christmas, and that means it’s time to get fancy in the kitchen! Something like a Gingerbread bûche de Noël sounds like the right way to celebrate. Way back in the early days of this space, I made another bûche. That one was all done up with stumps, meringue mushrooms and faux wood grain…this one’s easier in that it’s just a roulade but it’s still a showstopper and, of course, it still has several steps. In addition to a gently-spiced geniose-style gingerbread sponge cake, there’s a cream cheese filling, a marshmallow meringue frosting and, for crunch and sparkle, a pecan praline.
If you’re the organized type, you can actually break up the steps and knock out the praline and filling a day in advance, but I did it all start to finish in one afternoon, so I can tell you that it’s procrastinator-friendly, too. I did kind of goof up the cake a bit, and you can see it in the center of the spiral. I deflated the cake batter while mixing in the butter at the end. I was pretty annoyed with myself, and worried it would be like eating a rubber mat, but there’s a lot going on with this cake and we also had it with a scoop of eggnog ice cream, so it really wasn’t that noticeable. Next time, I’ll do better with that. Although the marshmallow makes a stunning, glossy, snow-white frosting, I had a lot left over…next time, I’ll also try cutting that amount in half. I’ll reduce the cream of tartar in the frosting a bit as well because I think it gave the marshmallow a slightly acidic taste. If you’re on the fence about gingerbread (I know not everyone is crazy about it), the flavoring here is very subtle…no molasses or cloves or other dark and mysterious flavors.
For the recipe, see Baking Chez Moi by Dorie Greenspan (it’s also here and here, along with a video). Don’t forget to check out the rest of the TWD Blogroll. Happy holidays!! xoxo
Tuesdays with Dorie BWJ: Chocolate-Mint Nightcaps
December 16, 2014 at 12:01 am | Posted in BWJ, cookies & bars, groups, sweet things, tuesdays with dorie | 9 CommentsTags: baking, chocolate, cookies, dessert, holiday
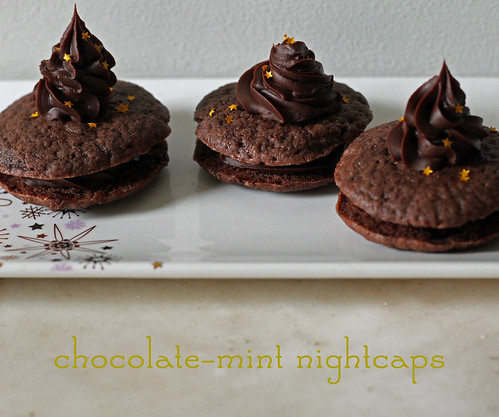
Every Christmas, I have visions and hopes of a cookie baking extravaganza. And every Christmas, other things (work, visitors, forgetting to buy sugar, general laziness) seem to get in the way…not only is there no baking extravaganza going on in my kitchen, there is not a single cookie to be found. I try my best not to poop out on TWD each week, and lucky for me these Chocolate-Mint Nightcaps from Marcel Desaulniers are, ya know, seasonally flavored. I think I’ve finally make a Christmas cookie– yay!
These are little cocoa sandwich cookies, filled and (night)capped off with a squiggle of dark chocolate and mint ganache (the recipe calls for steeping fresh mint, but a drop or two of peppermint extract is what I used in its place). Before I had even read the recipe, I made the assumption that the cookies would have a fauxreo thing going on…I was a little surprised that I wound up with a cakey batter when I mixed the dough. I made these late in the day and sandwiched a few as soon as they’d cooled. They were so soft and crumbly…even though it was clear that they weren’t going to be crispy wafers, I was not expecting them to fall apart like they did. Kind of of discouraging, but I decided to let the rest of my batch of cookies hang out unfilled overnight. Actually, I decided to let them sleep in the freezer, thinking that would really help them set (whether or not that was necessary, I don’t know). When I put them together with the ganache the next day, they’d firmed up and were like fudgy, minty brownie cookies. Seriously good….I only made a quarter-batch, or I’d definitely leave a couple out for Santa.
For the recipe, see Baking with Julia by Dorie Greenspan. Don’t forget to check out the rest of the TWD Blogroll!
Tuesdays with Dorie BCM: The Rugelach That Won Over France
December 9, 2014 at 9:53 pm | Posted in BCM, cookies & bars, groups, sweet things, tuesdays with dorie | 11 CommentsTags: baking, cookies, dessert

The Rugelach That Won Over France is a spiral of cinnamon sugar, coconut, pecans, chocolate and dried cherries. I’ve made other Dorie rugelach once, no twice, before…in fact, hers is the only rugelach I’ve ever made. She uses essentially the same cream cheese pastry dough in each, and it’s great. It’s easy to make in the food processor, pretty easy to roll out and bakes up nice and flaky. But, while this version may have won over France, it wasn’t my favorite flavor combination. I thought it was a little dry compared to the other two, and I realize the difference is likely because they had some sort of jam in the filling and this one didn’t. I’d certainly give this a shot again, but would swap out the chocolate for some fruit jam.
I followed the recipe here, but instead of freezing my rolled up rugelach logs before slicing, I just chilled them in the fridge for a couple of hours. Then I cut them an inch thick, rather than 1/2-inch thick, for chunkier cookies.
For the recipe, see Baking Chez Moi by Dorie Greenspan. Don’t forget to check out the rest of the TWD Blogroll and please join us, if you haven’t already!
Tuesdays with Dorie BCM: Cranberry Crackle Tart
November 25, 2014 at 12:01 am | Posted in BCM, groups, pies & tarts, sweet things, tuesdays with dorie | 18 CommentsTags: baking, dessert, holiday, tarts
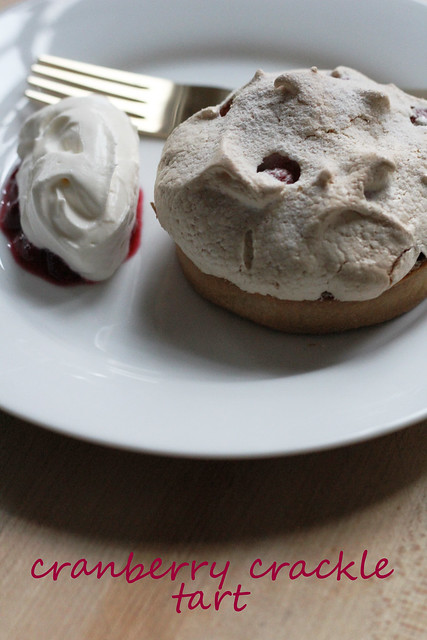
If you’re still on the fence about what to make for this Thursday’s dessert, let me make your decision harder by throwing one more option your way. This Cranberry Crackle Tart from Baking Chez Moi is for people who don’t mind breaking a bit with Thanksgiving tradition. It has a cookie-like base of sweet tart dough (fondly known to those in professional pastry circles as “STD”…we keep it classy), a layer of jam (which you can’t see here) and a meringue topping with cranberries folded though. The topping is like a crispy-edged marshmallow– the sweetness is interrupted by little bursts of softened, tart berries. This is meant to be a larger tart, but I didn’t need so much for the two of us on a random weeknight, so I just made a couple of individual tartlets (they took quite a bit less time to bake, btw). The big one, with its pretty, swirly meringue top and ruby-colored berries peeking through, would make an impressive dessert for a crowd. And it’s a light one, too, after a big dinner.
The hidden jam layer can be any red jam, really, like strawberry, raspberry or cherry. I made a cranberry sauce ahead of time from the extra berries that weren’t going into the tart and I used that instead. We ate our tarts with whipped cream, and my husband said it reminded him of pavlova with a cookie crust.
For the recipe, see Baking Chez Moi by Dorie Greenspan (it’s also here). Don’t forget to check out the rest of the TWD Blogroll and please join us, if you haven’t already!
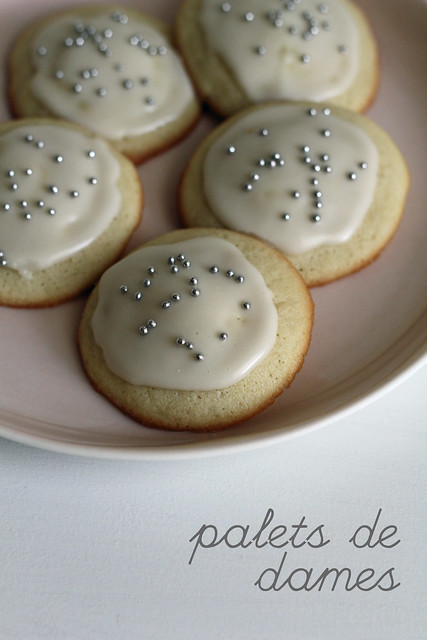
Tuesdays with Dorie BCM: Palets de Dames, Lille Style
November 11, 2014 at 12:01 am | Posted in BCM, cookies & bars, groups, sweet things, tuesdays with dorie | 29 CommentsTags: baking, cookies, dessert
In case you didn’t think Dorie Greenspan’s sweets were well-represented here (I’ve only made about 300 of them), I’m thrilled to tell you that Tuesdays with Dorie, the BCM edition kicks off today! Baking Chez Moi: Recipes from My Paris Home to Your Home Anywhere is Dorie’s latest gem. It’s a huge book filled with recipes– some are French classics, some are French twists and some are not-so-French, but her Parisian friends love them. We’ll be baking from BCM on the second and fourth Tuesdays of each month, and Laurie, Jules and I hope we’ll see a lot of new bakers join in the fun! The recipes are awesome, the rules are relaxed and there will be group nominations each month to decide what we’ll make– fun!. (Don’t worry– we’re not abandoning Baking with Julia. In fact, we’d love to have more folks jump in as we move through the second half of that book.)
Now, onto Palets de Dames, our first recipe! Palet means “puck” in French. While they may be shaped like little disks, there’s nothing hockeypuck-ish about these little cake-cookies. They’re soft and flavored with vanilla and are a perfect tea or coffee break treat. The cookie dough is actually like making a simple cake batter and the icing is just whisked together. Not too hard, although somehow I did manage to make a little screw up. I think I was actually supposed to dip their bottoms in glaze and serve them upside-down. I did the opposite. Oh well…ce n’est pas grave, as they say. They’re still dainty and cute, and I thought they deserved a little sparkly bling on top of the sweet glaze to celebrate our first BCM post.
For the recipe, see Baking Chez Moi by Dorie Greenspan (it’s also here). Don’t forget to check out the rest of the TWD Blogroll and please join us, if you haven’t already!
TWD BWJ Rewind: Raspberry-Plum Crostata
September 30, 2014 at 12:01 am | Posted in BWJ, groups, pies & tarts, sweet things, tuesdays with dorie | 13 CommentsTags: baking, cake, dessert, fruit
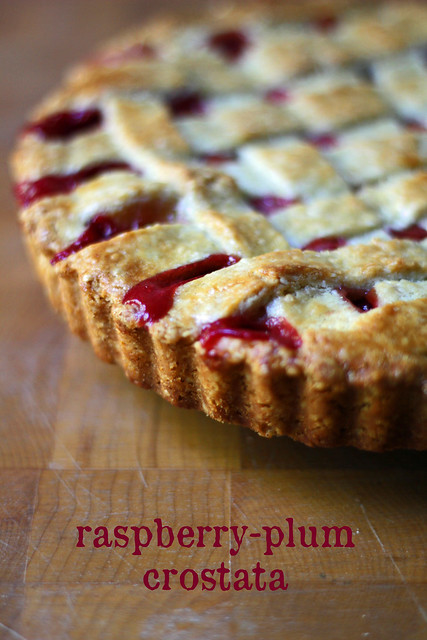
I’ve had a busy September. It’s one of the nicest months of the year in New York City, but I’ve hardly been home to enjoy it. (Not that I’m complaining…I’ve been here and here instead, and it was all in the name of fun.) Luckily, I was able to squeeze in the Raspberry-Plum Crostata from Leslie Mackie before I began running around. This crostata recipe originally called for a raspberry-fig combo, but I swapped out the figs for plums, just because I already had them. I also tweaked the proportions a bit, and instead of a 1:1 ratio of each fruit, I used 2 parts plums to 1 part raspberries (keeping the combined weight the same 1.5 pounds called for in the recipe). I decreased the sugar in the filling a little, too.
The crust dough is soft and needs to be worked with gently and quickly. Despite its fussiness, it’s easily patched, and I liked the interesting sesame-almond flavoring it has going on. The filling was tasty, too, and that hot pink color makes me a happy girl. I’ll make this one again, and maybe next time I’ll go buy the figs.
For the recipe, see Baking with Julia by Dorie Greenspan (it’s also here and there’s a video, too). Don’t forget to check out the rest of the TWD Blogroll!
Tuesdays with Dorie BWJ: Oven-Roasted Plum Cakes
September 2, 2014 at 2:11 pm | Posted in BWJ, cakes & tortes, groups, simple cakes, sweet things, tuesdays with dorie | 11 CommentsTags: baking, cake, dessert, fruit

These Oven-Roasted Plum Cakes from Marcel Desaulniers were an easy little treat to make with my CSA plums. The batter was a simple butter cake, flavored with orange zest. I made half a recipe (6 cakelettes), so I just mixed it by hand. I had to sub some plain yogurt for the buttermilk, but that worked out fine. The recipe calls for the cakes to be baked in ramekins or custard cups…I was worried that I’d never get them out (although sounds like I needn’t have been), so I used some shallower mini pie tins instead, buttered and floured.
These were good, although the plums (even though they turned very soft in the oven) wanted to jump onto our forks all in one piece. I liked them best with whipped cream. For the recipe, see Baking with Julia by Dorie Greenspan (there’s also a video). Don’t forget to check out the rest of the TWD Blogroll!
Blueberry-Sour Cream Ice Cream
August 30, 2014 at 11:41 am | Posted in ice creams & frozen, sweet things | 13 CommentsTags: dessert, ice cream

Summer is about bright nail polish and ice cream cones. Why the heck have I waited till the tail end of it to both paint my nails coral and to make my first homemade ice cream of the season? The color is new for me, but the ice cream is sort of one I’ve already made here before. Am I allowed a redo? I hope so, because while this ice cream has the same flavors as the one I made six (gasp!) years ago, I found that one to be a little too fatty, a lot too hard and also too homogenized. This a totally different recipe and technique, with swirls of dark purple blueberry sauce in a tangy, scoopable base.
Most homemade ice cream aficionados out there have probably at least tried out Jeni’s technique, which concentrates and denatures dairy proteins by boiling off some of the water in the milk and cream, and uses cornstarch and cream cheese to thicken the base…these steps make the finished ice cream less icy and hard when frozen. I thought this eggless base would be a good match for blueberry sauce, and since it has a bit of cream cheese in it already, it would also go right along with the tang of sour cream.
This is ice cream and sauce in one– perfect for cones!

Blueberry-Sour Cream Ice Cream (makes about a quart)
inspired by and adapted from Jeni’s Splendid Ice Creams at Home by Jeni Britton Bauer
Steph’s Note: I like to store my homemade ice cream in a restaurant-style 1/6 pan with a snap-on lid. Freeze the empty stainless steel container while the ice cream is churning, and you’ll be good to go!
for the blueberry sauce:
1 cup blueberries
squirt of lemon juice
1/4 cup sugar
1 tsp cornstarch
1 tbsp cold water
-In a small pot over medium-low heat, add the blueberries, lemon juice and sugar. Stir occasionally for about 5 minutes, as the sugar dissolves and the berries begin to break down and release juice. (You can gently squish some of the berries as they cook to encourage “saucing”…I like to leave about half the berries somewhat intact for texture.)
-Meanwhile, mix together the cornstarch and cold water in a small bowl. Add to the cooking berries and bring to a gentle bubble for about a minute, stirring constantly. After about a minute, the sauce will thicken slightly (you are just looking to give it a little more body), at which point remove it from the heat, transfer it to a container and refrigerate it until completely chilled.
for the ice cream:
11/2 cups whole milk
2 tablespoons corn starch
2 ounces (4 tablespoons) cream cheese
⅛ teaspoon fine sea salt
1 cup heavy cream
2/3 cup sugar
2 tablespoons light corn syrup
½ cup sour cream
-In a small bowl, mix about 2 tablespoons of the milk with the cornstarch to make a smooth slurry. In a medium bowl, add the salt and room-temperature cream cheese and whip it smooth. In a large bowl, make an ice bath (heavy on the ice) and set aside.
-Pour the cream, sugar, corn syrup, and remaining milk into a 4-quart saucepan. Bring to a rolling boil over medium-high heat, set a timer for precisely 4 minutes and boil for exactly 4 minutes—you will need to be right there with it, stirring and adjusting heat so as not to endure the cleanup that comes with a dairy boil-over! Remove from the heat and gradually whisk in the cornstarch slurry. Return the mixture to a boil over medium-high heat and cook, stirring until the mixture is slightly thickened, about 1 minute. Remove from the heat.
-Gradually whisk the hot milk mixture into the cream cheese until smooth. Do this a little bit at a time so that you can whip out any lumps of cream cheese. Whisk in the sour cream (or if you’ve had a hard time getting out lumps, place the sour cream in a separate medium bowl, strain the milk mixture over the sour cream and then whisk them together).
-If you are not making your ice cream until late in the day or the following day, place the bowl in your ice bath and when cold, transfer to the refrigerator until churning. If you need more immediate ice cream, do a fast chill by pouring the mixture into a 1-gallon Ziploc freezer bag, sealing, and submerging the bag in the ice bath. Let stand, adding more ice as necessary, until very cold, about 30 minutes.
-Pour the chilled base (if you used the Ziploc bag method, you can do this by just cutting off a corner of the bag) into the frozen canister of your ice cream machine. Churn according manufacturer’s directions.
-Transfer to a container for freezer storage, press a sheet of parchment paper directly against the surface, and seal with an airtight lid. Freeze at least 4 hours before serving.
Tuesdays with Dorie BWJ: Poppy Seed Torte
August 5, 2014 at 5:03 pm | Posted in BWJ, cakes & tortes, groups, simple cakes, sweet things, tuesdays with dorie | 17 CommentsTags: baking, cake, dessert
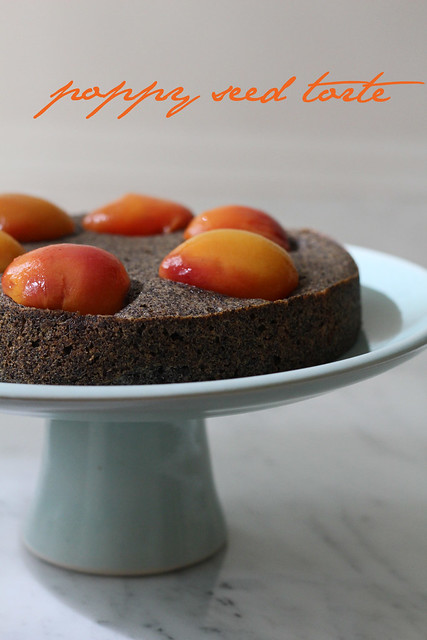
Markus Farbinger’s Viennese Poppy Seed Torte is one of the more unusual things I’ve baked. Now, I’m aware that poppy seeds are widely used in foods all over the world and are not unusual at all, but we Americans– especially those of us who are many generations and more than a couple hundred years removed from our ethnic roots– normally just mix a mere tablespoon of them into lemon muffins or white cake, or sprinkle them on top of bagels or crackers. Maybe it’s because we’re afraid we’ll fail a drug test, but any recipe that calls for two cups of poppy seeds sounds a little strange. The Austrians sure know their pastries though, so I knew this would be tasty, no doubt.
Those two cups of poppy seeds are whizzed up in a coffee/spice grinder, and along with cake crumbs (I used a frozen slice of leftover Vanilla Pound Cake, also put through the same coffee grinder) become the dry ingredients for the cake. The crowning jewels on top are poached apricot halves. I found the cutest little apricots with rosy cheeks at the Greenmarket. I didn’t bother to blanch and peel them before poaching…the skins slipped right off anyway once they cooled, and I think poaching them skin-on helped infuse the flesh with that rosy color. I’m saving the poaching liquid, btw, which I think will be nice as a fruity simple syrup for drinks or poured on top of raspberries and vanilla ice cream.
Based on visuals alone, I’d assume a dark colored cake like this would be dense and heavy. But it’s quite light and springy (thanks to the meringue that’s folded into the batter), moist and not too sweet. It really tastes like poppy seeds (as it should), and since they are ground into flour, they don’t get stuck in your teeth! I made a half-recipe..a full makes a big 10-inch cake…and debated the pan size for a while before settling on a 8-inch round.

For the recipe, see Baking with Julia by Dorie Greenspan (there’s a a video here of Chef Markus making the cake in a totally rad vest). Don’t forget to check out the rest of the TWD Blogroll!
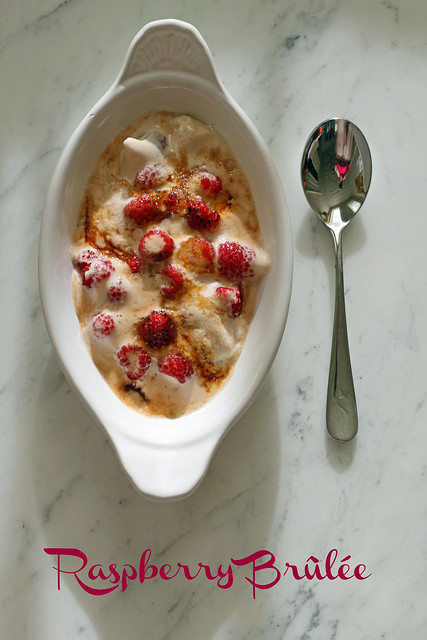
Raspberry Brûlée
July 23, 2014 at 4:45 pm | Posted in pudding/mousse, sweet things | 9 CommentsTags: baking, dessert, fruit
The promise of a blueberry pie made my husband finally agree to drive me out to the country for some berry picking last Saturday. It’s good to know that bribes do work, although I still haven’t made good on my end…this is obviously not blueberry pie. We came with a quart of U-pick raspberries, too, so using those delicate jewels became my first priority. Not turning on the oven became my second priority.
You may see the words “raspberry brûlée” and think immediately of Prince, or you may see them and think of crème brûlée…I assure you this is far less fancy than either, even though it looks and tastes like a million bucks. In fact, apart from straight-up fresh fruit, this might be one of the easiest summer desserts out there. It’s simply whipped cream folded with fresh raspberries and given a torched sugar top. It’s fresh and light as air, but with but with a sweet crunch.
A lot of times the broiler works as a reasonable alternative to a kitchen torch. I’m not sure how it would do in this case though, since whipped cream is not as sturdy as a custard. You want a bit of runny, melted cream just under the crispy brûléed top, but I suspect the boiler may take melting the cream a step further than a torch would.
Raspberry Brûlée- serves 6-8
adapted from Saveur Magazine, Issue 94
Steph’s Notes: The dish can also be made with tayberries (which I have never seen here before) or blackberries, and I’m sure diced peaches or nectarines would be tasty, too.
1 ¼ cups heavy cream
¼-½ cup powdered or superfine sugar (depending on how sweet you like it and how sweet your berries are)
splash of cassis or frambiose (optional)
2 pints raspberries
⅓ cup demerara sugar
– Put the heavy cream into a large bowl and beat until medium peaks form. Add the powdered or superfine sugar and the booze (if using) and continue beat to stiff peaks.
-Add the raspberries to the whipped cream and fold gently to coat. Carefully transfer raspberries to a wide serving dish or divide them between 6-8 individual gratin dishes and liberally strew the top with demerara sugar. Using a kitchen torch, evenly caramelize the sugar until it gets bubbly and darkened in some spots. A bit of the top layer of cream will start to “run” in this process, but if you don’t hold the torch too long in one place, what’s underneath will stay whipped.
-Refrigerate brûlée for about 15 minutes to let the sugar harden. If you’ve used one large serving dish, scoop servings into bowls, making sure that each scoop includes some of the crunchy sugar topping. If you used individual gratin dishes, just grab spoons. Serve immediately.
Baked Fresh Weekly

Blog at WordPress.com.
Entries and comments feeds.
