Daring Bakers in July: Strawberry Mirror Cake
July 30, 2007 at 3:43 pm | Posted in cakes & tortes, daring bakers, groups, sweet things | 50 Comments
Sometimes when a challenge is thrown my way, I shake my Magic 8 Ball to predict the outcome. But here, I think I’ll take a cue from the Queen in Snow White: “Mirror, mirror on the wall. Will I skate through my first Daring Bakers challenge, or will I fall?”
Yes, that’s right. I’m now a whisk-wielding member of Daring Bakers. For months I’ve read about the escapades of this group, and I’m very pleased to be able to display the logo myself. Isn’t she cute?

Our hostess of the month, Peabody from Culinary Concoctions by Peabody, had us tackle a strawberry mirror cake. I’ve actually made a similar cake once before (in culinary school…I think we called it “fruit mousse miroir”), so I was reasonably familiar with its components– sponge cake Bavarian cream and gelée. I knew that gelatin is what makes this cake possible, but I don’t eat red meat, so I also do my best to avoid gelatin. One of the hard and fast rules of DB membership is that you must make the recipe the way it is written, and resist the urge to tinker and tweak. An exception is allowed for food allergies or strong aversions, so the green-light was given to use agar-agar as a gelatin substitute.
Armed with my agar powder, a whole bunch of eggs and several baskets of surprisingly nice-looking winter strawberries, I set out to make the cake.

I started by making the sponge cake, which was easy and really delicious. I had a fair amount of scrap left over, so I stuck it in the freezer where it is waiting to be reincarnated, possibly as a trifle….mmm.
From there, however, things took a turn for the difficult. I had never actually used agar-agar before, and really had no idea how. I did some reading on the subject, but perhaps too much, because I wound up confused. You can substitute powdered agar-agar for powdered gelatin in equal amounts, but strawberries are acidic, so they might require more agar…you need to boil it, but it sets at room temperature, blah blah blah. What did I get myself into?
In terms of dissolving the agar-agar in boiling liquid, I did what I thought was best without altering the amount of liquid in the recipe (that was my real concern with using the stuff). Everything looked the way it was supposed to, which was a good sign. So I crossed my fingers and slid the cake tin in the fridge for a nice long rest. When I popped the cake out of the tin, I couldn’t believe how big it looked on the stand–with only two of us in the house, I’m used to just making little six-inchers. It was quite shiny and splendid in all its red and pink glory, and I could actually see a bit of my reflection on the surface!

It’s not all about looks here, though. What’s inside counts, too. I knew I had to bite the bullet and cut the cake, and I was nervous. The Bavarian cream was a bit softly set, but held up fine. Sadly though, it had a bit of a pasty texture that I wasn’t too fond of. I know that had nothing to do with the original recipe. It was the fault of the agar, or more likely, the fault of the person using the agar.

I’m not too keen to blindly experiment with agar-agar again anytime soon, but I have a packet in my pantry in case the urge surfaces. I am a Daring Baker now, after all.
To see how the other DB members tackled this assignment, visit the Daring Bakers’ Blogroll. And if you know of any worthwhile books with recipes designed specifically for agar-agar, or if you’ve had good luck with any of the Kosher gelatins available, please let me know!
SHF#33: Tropical Pavlova
July 27, 2007 at 10:02 am | Posted in events, other sweet, sweet things | 17 Comments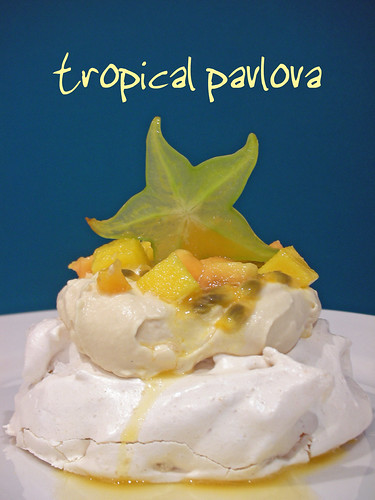
I only realized that it was time again for Sugar High Friday when I saw the great-looking posts popping up on other blogs. Recipes with mango, coconut, pineapple…it didn’t take a genius to see that this month’s host Mary from alpineberry has chosen “tropical paradise” as the theme. Right on time, too. I could use something lighter– I’ve just about OD’ed on chocolate mud cake from that madhatter I decorated over the weekend. Also, there’s a really good selection of tropical fruit here (I think Queensland is a big growing region). It all looks really nice and is easy to find.
I didn’t have to wonder long what tropical concoction I would make. The new issue of delicious. magazine was in my mailbox on Tuesday, and on the cover was a winter pavolva with poached quince and cinnamon whipped cream. Of course those particular flavors wouldn’t whisk me off to palm trees and hot sand, but I immediately thought that a pavlova would be an excellent vehicle for tropical fruit. So I went to the market and came back with passion fruit, mango, papaya and star fruit. To amp up the tropicaliness (new word!) of the dessert, I folded a little fine desiccated coconut into the meringue before baking and I sweetened the whipped cream with soft palm sugar.
If you’ve never had a pavlova before, it’s a legendary Australian dessert, although I think the Kiwis also argue that it’s theirs. I don’t who’s right about that, but I do know that crispy-on-the-outside, chewy-on-the-inside meringue topped with whipped cream and tropical fruit will make you feel like you are somewhere far away from your small city apartment.

Tropical Pavlova – makes 4 servings
adapted from delicious. (August 2007)
for the meringues:
2 egg whites
pinch of salt
125 g superfine sugar
1/2 t white vinegar
1/2 t vanilla extract
1 t cornstarch
2 T desiccated coconut (optional)
for the whipped cream:
200 ml heavy cream
2 T palm sugar (can substitute 2 T powdered sugar, sifted)
for the fruit:
use whatever you like
-for the meringues: Preheat oven to 230°F/120°C. Draw four 9 cm circles on a sheet of parchment, leaving space between. Flip the parchment over and use to line a baking sheet (make sure your circles are visible beneath the sheet).
Using a mixer, beat whites with a pinch of salt until they hold soft peaks. Gradually sprinkle in the superfine sugar, beating well between each addition. Whip until the whites are stiff and shiny. Carefully fold in the vinegar, vanilla, cornstarch and coconut (if using). Pile meringue onto circles on baking sheet and spread to size, making an indent in the center of each.
Bake for 50 minutes. Meringues should be crisp on the outside. Turn off oven, crack door slightly and cool meringues in oven for 1 hour. Remove from oven to finish cooling.
-for the whipped cream: Whip the cream to soft peaks with the sugar.
-to assemble: Pile whipped cream on top of the meringue indents. Top with cut fruit.
Honey Nut Tart
July 24, 2007 at 12:57 pm | Posted in out of town, pies & tarts, sweet things | 9 Comments
I don’t think I mentioned this, but R and I made a weekend trip to Auckland, NZ back in early June. I was my first time in the country, and since it’s probably the closest “foreign land” (anywhere else seems to be at least a nine hour plane ride away), I’m sure we’ll be back. I’m dying to go to the South Island, home of the world’s best Sauvignon blanc…but I digress! We had great time in Auckland. It’s a nice small city with big city food. We had a beautiful dinner and way too much wine at The French Café. During a leisurely lunch at The Grove, we even got to chit-chat with one of the owners, an American who fell in love with the country while traveling years ago.
On Sunday afternoon, we took a short ferry ride from downtown Auckland over to Waiheke Island, where, thanks to the advice of a friend of a friend, we had made a lunch reservation at a vineyard called Te Whau. I very much enjoyed their signature house-smoked salmon, and then had john dory (my favorite fish–lucky for me it was a special that day). I’ve gotta draw the line somewhere, so I don’t normally go for dessert with lunch, but this was vacation. I wouldn’t beat myself up too much if we just shared one. Exercising my wifely right to make decisions for “the team,” I decided that we should try the honey pine nut tart with vanilla ice cream. It was delicious…lots of toasty pine nuts held together in a honey goo. Not that pecan pie can be improved upon in any way, IMO, but this was sort of like its fancy cousin.
After over a month of thinking about it and wanting to make it at home, I finally did a bit of research and found this recipe on Recipezaar. I apparently didn’t do a very thorough read-thru of it before I went grocery shopping, though, and wound up not buying nearly enough pine nuts. I had some walnuts in the fridge, so I used roughly a 50/50 combo instead. Oh well–just as tasty and cheaper, too, I imagine. The honey I have is one that I bought at a farmers’ market; it is quite floral and went nicely with the lemon in the recipe. I know that in the northern hemisphere right now everyone is enjoying peaches and berries, but in the cooler weather down here, when there isn’t a lot of good looking fruit around, a tasty nut tart is just the ticket.

Warning: If you open the recipe link, your eyes may want to wander over to a box on the right side of the webpage containing nutrition (or lack thereof) information. Don’t let your eyes do this, or you may never make the recipe.
Back to School: Madhatter Cake
July 22, 2007 at 5:15 pm | Posted in around sydney, cakes & tortes, classes, sweet things | 33 Comments
I’ve just finished a two-day decorating course on a wacky cake design called a “madhatter cake.” I took the course at Planet Cake in Balmain, where they make all sorts of gorgeous couture cakes.

I’m by no means an expert cake decorator, so there were plenty of things I found tricky about this design. It required a lot of precise trimming to get the angles on the finished cake just right. Also, while I have covered plenty of cakes with rolled fondant, the moment before I drape the fondant over the cake, I always have a mini heart attack! I find it so hard to make it perfect, and it’s even more so when the shape is all “wonky” like this. All in all, I’m quite happy with the way this came out though, and I’m especially fond of the poofy bow on top (even though I did slightly ding up one side of it in the car on the way home–crap!). The cake inside is a very dense mud cake that R and I will be eating for the next five years.

WCC#18: Nanaimo Bars
July 5, 2007 at 6:48 pm | Posted in cookies & bars, events, sweet things | 27 Comments
“This looks good. What is it?” R asked.
“It’s a Nanaimo bar,” I replied.
I may be from south of the border, but when I saw that the theme of this month’s Weekend Cookbook Challenge is “red and white,” I immediately thought of the Canadian flag. Perhaps this was because Canada Day had just passed, or perhaps because Sara from i like to cook (creator and host of WCC) lives in Canada…I don’t know. I did know that I wanted to make Nanaimo bars, a British Columbian treat named after a city on Vancouver Island, for my entry. I love these simple bar cookies, with melt-in-your-mouth ganache and filling layers and a chocolaty graham cracker crust (a little goes a long way, though, as they are really sweet). So I opened a book with a red and white spine, The King Arthur Flour Cookie Companion, and found the recipe I was looking for.
I have to admit that I thought this would be a pretty easy recipe to whip up. I didn’t know that the “challenge” part of the equation would be finding graham crackers here in Sydney. I went to four different grocery stores, one 7-11 and one import shop, but no luck. I thought about replacing them with plain chocolate wafers, but couldn’t find those either. Worn out from my search, I went home and made my own graham crackers from a recipe in the same book. (While they were quite good on their own, I don’t think making graham crackers from scratch is necessary for these bars. Therefore, I’m not including those steps below. If like me, you cannot find them at the store, let me know, and I’ll be happy to add the recipe.)
I don’t remember when I first had a Nanaimo bar, but it could have been on any number of trips up north. My first time in Canada was with Grandma W, who took me to Vancouver for the 1986 World’s Fair. Since then, I have traveled extensively through the country. Two weeks spent on Grand Manan Island with high school classmates sealed my love of the Maritime Provinces. The cute, smart, funny boy from Dundas, Ontario that I went out with for three years was reason enough to make the trip to the Toronto area several times. I have probably been to more national parks in Canada than in the US, and I think there is no place more beautiful than the Canadian Rockies in early spring. Where do I hope to go next? Maybe PEI or Quebec City. Although now that I really think about it, while I have been to Victoria, I have never been to Nanaimo…
Nanaimo Bars– makes 48 small bars
adapted from The King Arthur Flour Cookie Companion
for the crust:
1 stick (4 oz) unsalted butter, melted
1/4 cup (1 3/4 oz) sugar
1/3 cup (1 oz) unsweetened cocoa powder
1 large egg
1 cup (3 oz) sweetened flaked coconut
1/2 cup (2 oz) chopped walnuts
1 t vanilla extract
2 cups (10 oz) graham cracker crumbs
for the filling:
1 stick (4 oz) unsalted butter, softened
2 cups powdered sugar
1/2 t vanilla extract
2 T instant vanilla pudding mix
2 T milkfor the frosting:
1 cup (6 oz) chopped dark chocolate
2 T (1 oz) unsalted butter
-for the crust: Preheat oven to 350°F/180°C. Grease a 9×9-inch or 11×7-inch pan and line the bottom with parchment. Combine melted butter, sugar and cocoa in a bowl, then mix in the egg. Stir in the coconut, chopped nuts, vanilla and graham cracker crumbs. Press into the botton of the prepared pan and bake for about 10 minutes. Cool crust completely before filling and frosting.
-for the filling: Cream the butter by hand in a medium bowl and add in 1 cup powdered sugar and the vanilla. In a separate small bowl, stir the milk and pudding mix together, then add to the butter mixture. Add in the remaining powdered sugar and beat vigorously until free of lumps. Spread over the cooled crust and refrigerate until cold (half an hour is good).
-for the frosting: Melt the chocolate and butter together using a double boiler or the microwave, stirring until smooth. Spread and smooth over the chilled bars and refrigerate until set (another half hour or so). Cut with a sharp knife (heat your knife if you have trouble with the chocolate cracking).
SHF#32: German Chocolate Cake, my sweetest thing
June 25, 2007 at 6:40 pm | Posted in cakes & tortes, events, layer cakes, sweet things | 21 Comments
Hmmm….two cake products in one week. I am good to myself, aren’t I? Of course I will have to be punished with an extra trip to the gym. I couldn’t help it though. I’ve had German chocolate cake on the brain ever since I read the theme of this month’s Sugar High Friday, hosted by its founder Jennifer, The Domestic Goddess. Since childhood it has been my dream dessert. I just love the combination of chocolate, pecans and coconut. I would always ask my mum to make me a German chocolate cake for my birthday (and she always would).
I still request it every April 3, but R has yet to deliver the goods. It’s not for lack of trying though. You just don’t see it sold very often. This past birthday, he did call every German bakery in Sydney looking for it (how sweet!). No one had any idea what he was talking about, because it isn’t German at all. An Englishman man named Sam German developed a type of sweetened chocolate used in the traditional recipe, which likely originated in the American south.
I don’t make this very often, and that’s quite on purpose. Maybe it’s a bit masochistic, but I want it to remain something desired and special. Looking for a recipe, I decided to go with one from Baking Illustrated by the editors of Cook’s Illustrated Magazine. Although I hadn’t made this version before, Chris Kimball and the gang never let me down. Their version uses cocoa powder rather than German chocolate, so it was easier for me to find all the ingredients here in Sydney. In the recipe, the coconut/pecan goo goes in between the layers and on top of the cake, leaving the outside of the cake exposed. Since R and I would have this cake around for a couple of days, though, I decided it would probably stay fresher if I sealed up the sides. Luckily I had some leftover cream cheese frosting from my coconut cupcakes to use up. I just added some melted dark chocolate to the frosting and iced the cake with it, using up all of the filling between the layers. Then I decorated the cake with some toasted coconut chips. Yum! I can’t wait to have another slice tonight!

German Chocolate Layer Cake with Coconut Pecan Filling – makes 12 servings
adapted from Cook’s Illustrated’s Baking Illustrated
for the cake (two 8-inch rounds):
1 1/4 cups (6 1/4 oz) unbleached AP flour
1/2 t baking soda
1/2 t salt
1/4 cup non-alkalized cocoa, such as Hershey’s
2 t instant coffee or espresso powder
1/3 cup boiling water
1/3 cup buttermilk or plain yogurt
2 t vanilla extract
12 T (1 1/2 sticks) unsalted butter, softened
1 1/4 cups (8 3/4 oz) granulated sugar
3 large eggs, room temperaturefor the filling:
4 large egg yolks
1 cup (7 oz) granulated sugar
1/4 t salt
8 T (1 stick) unsalted butter, softened
1 cup heavy cream
1 t vanilla extract
2 cups sweetened shredded coconut
1 1/2 cups chopped pecans, toasted
–For the cake: Preheat oven to 350°F/180°C. Grease and flour two 8″ round pans lined with parchment rounds. Combine cocoa and instant espresso powder in a small bowl. Add boiling water and mix until smooth. Let cool to room temperature, then stir in the buttermilk and vanilla.
Using a mixer, beat butter until smooth (about 30 seconds). Gradually add the sugar and beat until light & fluffy (about 5 minutes). Beat in eggs one at a time, combining well after each. Scrape down the mixing bowl.
Whisk the flour, baking soda and salt in a bowl. With the mixer on low, add 1/3 of the dry ingredients and 1/3 of the cocoa mixture to the batter. Repeat twice more, scraping as needed, until ingredients are just combined.
Divide batter evenly between the pans. Bake 23-30 minutes until a toothpick inserted near the center comes out clean. Cool in pans for 10 minutes on wire rack. Turn out of pans and cool completely before assembling.
–For the filling: Whisk yolks, sugar and salt in a medium saucepan. Beat in the butter, and then gradually add cream and vanilla. Cook over low heat, stirring constantly, until the mixture reaches 180°F. This will take about 15-20 minutes, and the mixture will be puffy and slightly thickened. Transfer to a bowl and cool to room temperature. Stir in the coconut and pecans before assembling cake.
–To assemble: Cut both cakes in half horizontally so you have four layers total. Spread 1/4 of the filling on top of each layer, stacking as you go.
Coconut Cupcakes
June 20, 2007 at 7:11 pm | Posted in cupcakes, sweet things | 23 Comments
Every week, in my efforts to perfect a second language, I take a Spanish class through The University of Sydney’s continuing ed program. Yesterday was the last class of the level, so I volunteered to bake up a batch up of something to bring in for fiesta-time. And I was really in the mood for cake.
I’ve had Ina Garten’s The Barefoot Contessa Cookbook for years, and for years the picture on page 174 of a snowy white coconut cupcake has been taunting me. Just to show that picture who’s boss, I’ve refused to make them– until yesterday, when I finally gave in to it’s seductive stare.
My class was small, so I halved her recipe (seems as though I halve every recipe I make). My half-batch gave me 15 regular-sized cupcakes, and I have enough frosting left over to probably frost another eight! In the cake itself, I used regular coconut flakes, but I found coconut chips at the health food store to use for garnish. I lightly toasted them in the oven before sprinkling them over the cupcakes.

While I do like to eat some cakes cold (I love cake with chooclate frosting straight out of the fridge), these are best at room temperature. The cream cheese frosting is gooey and soft. And the cakes have a delicate almond flavor. No wonder so many other people have posted about these cupcakes. If you want to make them, too, but don’t have the book, the recipe is here on Food Network’s site.

So….¿Cómo se dice ‘cupcake’ en español? Since cupcakes aren’t really part of Spanish/Latin food cultures, it seem as thought there is no definitive translation. In fact, I read on a couple of sites that in many Hispanic countries people initially mistake cupcakes for muffins, since they have they same shape!
WCC#17: Lemon Polenta Cake
June 7, 2007 at 4:58 pm | Posted in cakes & tortes, events, simple cakes, sweet things | 50 Comments
For me, Foodie Chickie Ani couldn’t have come up with a more timely theme for the latest Weekend Cookbook Challenge. After taking that cooking class with Rachel Grisewood a couple of weeks ago, I’ve been sampling more of Manna From Heaven’s products when I see them about town. One of Manna’s most popular little treats is a little, iced lemon polenta cake. Manna’s website has a great picture and describes them as “gluten free cakes made with polenta, coconut and ground almonds.” When I saw that Ani had chosen “cornmeal” for the throwdown, I knew instantly that I wanted to try to make these little guys at home.
I scoured some of my baking books for a recipe I could adapt, but had no luck on my bookshelf. So I decided to use the internet as my cookbook (hopefully this is within the Challenge rules!), and found something that sounded pretty spot on. Using almond meal and cornmeal instead of flour, this recipe also has lots of coconut, lemon zest and juice in the batter.
Rather than bake one large cake, as instructed in the recipe, I made individual ones using my friand tin (with a shorter cooking time, of course). I made half a recipe and got nine friands. Also, I heated up the lemon glaze, which is really a syrup that gets poured over the warm cakes before icing, in order to disolve the sugar in the juice.

My cakes came out great– a very good knock-off! They were moist and tasty, and the shreds of coconut gave them a little chew. Suggestions for next time…maybe I’d add in just a drop of almond extract.
Lemon Polenta Cake– makes eight servings
modified from a recipe by Roger Bayley
For the cake:
130 g ground almonds (or almond flour)
130 g shredded coconut
130 g fine polenta (or yellow cornmeal)
1 t baking powder
grated rind of 3 lemons
270 g soft butter
270 g caster sugar
4 eggs (55 g each)
juice of 2 lemons
For the lemon glaze:
juice of 2 lemons
sugar to taste
For the lemon icing:
250 g icing sugar
juice of ½ lemon, approximately
-Combine ground almonds, coconut, polenta, baking powder and lemon rind, and set aside. Using electric mixer beat butter and sugar until pale and fluffy.
-Add eggs one at a time, beating well after each. Fold in dry ingredients and lemon juice until just combined. Pour mix into greased and lined 9-inch/24-centimeter round cake tin (not springform) and bake at 325°F/160°C for one hour or until golden and just coming away from the side of the tin.
-Meanwhile, make the lemon glaze by heating the lemon juice and sugar gently, until the sugar is just dissolved.
-Remove from the oven and cool in the tin. Run a knife around the edge of the cake to loosen. Pour on lemon glaze while cake is still warm.
-Allow to cool completely in tin before turning on to a plate, as the cake falls apart easily while warm.
-Spread the lemon icing over the cake when cooled completely. (You can make the icing more like a loose glaze by slightly reducing the amount of icing sugar.)
browniebabe #2: Brownie Sundae
June 4, 2007 at 7:16 pm | Posted in cookies & bars, events, sweet things | 7 Comments
I’ve been known to like some flashy things: fancy shoes, handbags, caviar. When it comes to brownies, though, I am decidedly plain-jane. No swirls of cheesecake, peanut butter or raspberry jam….a few walnuts on top are the only bling I like baked into my brownies. Now I know that, as much as I love it, my humble little square of chocolatey goodness probably won’t win me any awards on its own. Myriam at Once Upon a Tart has the cutest apron ever reserved for the winner of browniebabe of the month, and I at least want a shot at it! After wondering how I could jazz it up for my entry into the second event, I decided to turn it into a brownie sundae. Ice cream and chocolate sauce really do make everything better, don’t they?
This is my mother’s brownie recipe, and it’s the fudgy kind of course. My puddle of sauce is David Lebovitz’s “Lean Chocolate Sauce” from page 165 of his newest book, The Perfect Scoop, but he has a similar recipe here on his site. Any ice cream flavor you love with chocolate would be great on a brownie sundae. I used a caramel ice cream from Paddington-based Nice Cream (altough if KitchenAid Australia will ever finally sell me a part allowing me to use the ice cream maker attachment I brought from the US on my new machine here, I’d sure like to make Monsieur Lebovitz’s Vietnamese Coffee Ice Cream).
Julie’s Brownies – makes 6 servings (or one loaf pan)
3 oz unsalted butter
2 1/2 oz unsweetened chocolate
2 t instant coffee or espresso powder
pinch salt scant
1 cup sugar
2 large eggs
scant 1/2 cup all-purpose flour
handful of broken walnut pieces
– Preheat oven to 325°F/160°C. Butter a loaf pan and line the bottom with parchment.
– In a heavy bottomed pot, melt the butter and chocolate together over low heat, paying close attention so as not to burn. Add instant coffee or espresso powder and stir to dissolve. Stir in the sugar and salt. Let mixture cool until just warm.
– Once cooled, beat in the eggs, one at a time. Then fold in the flour until just combined.
– Spread batter into prepared pan, top with nuts and bake. Start checking them after 35 minutes, but they will probably take closer to 45. A tester will probably still come out sticky, so look for a thin slightly crackled layer on top.
– Let brownies cool completely before cutting them. (I think they are even better the second day.)
Back to School: Cooking Class
May 28, 2007 at 12:58 pm | Posted in around sydney, breakfast things, cakes & tortes, classes, sweet things | Leave a commentOn Saturday I took at baking class at Accoutrement’s cooking school in Mosman. It was lead by Rachel Grisewood from Manna from Heaven. She started out by having us make an intensely flavored raspberry passionfruit cake.

Then we made briche dough, and she demonstrated how we could turn it into loaves and pizza bases. We each got to take home a piece of dough…I turned mine into a couple of big glazed cinnamon buns with walnuts for Sunday breakfast.

Baked Fresh Weekly

Blog at WordPress.com.
Entries and comments feeds.
